I think I've fixed it. I followed the directions at this site Fluster Buster
Thursday, September 24, 2015
So, craft room cleanup and organization.
I'm about halfway through. I started back at the beginning of August, worked 2 days, long enough to make a huge mess in my dining room, then promptly caught the WORSE (put me to bed for days, and huge headache that wouldn't quit) sinus infection of my life...my usual ministrations didn't even touch it. I was so sick that after about 10 days I finally went to the doctor. (For those who know me...I NEVER go to the doctor.) Well suffice it to say, even with the antibiotic, I was sick for over a month, and am now only just feeling better. Every time I felt slightly better, I would work a little bit on my room or the mess in our dining room (tiny bit), and I would be sick again. ugh.
My poor family has been quite supportive and long-suffering. What a mess. My hubby helped me over the weekend, and I feel like my head's above water now.
Sorry no pictures, I'm too ashamed for the world to see the mess. Perhaps when my room is presentable. I'm hoping to finish in a few days.
Cheers.
Sheryl
Friday, November 15, 2013
Knots, swirls, squiggles, and tangles
So I've been looking at nautical knots, zentangles and other spirally, squiggly drawings and things. I really want to include them in my jewelry making. We'll see. Its been a while since I was here last. Sorry for the long delay. I'll try to upload a picture or two of what I've been working on.
Tuesday, January 1, 2013
Glass blobs pictures. Guess I forgot them a while back
 |
| backside |
 |
| backside of another |
 |
| newest necklace |
 |
| guess what that silver band is |
 |
| coiling--1st try. bracelet |
 |
| earrings to match |

 |
| front side |
 |
| front side of another |
 |
| very large pendant |
 |
| 1st very large pendant I made |
 |
| nautilus shell ring |
 |
| silver colored beads along shell, moonstone in center |
 |
| side view basket weave |
 |
| I had this piece of left over copper, and just messed around until this developed |
 |
| shooting star |
 |
| clear glass large blob with viking weave |
zsmom
Cinderella’s Pumpkin Carriage Tutorial part 2
Here goes nothing.
I got to this point and had intended on molding the
bracelet around of a mandrel at that point. But it just cried out for some
embellishing since it was “Cinderella’s Pumpkin Carriage”. I mean, what type of
carriage was only copper colored?
 |
| Remember, I started with componenets |
 |
| wire-wrapped them together |
Hmmmmmm. Looks like I could use viking weave in the center to make the beginnings of the carriage body. When I did decide to embellish it, I went all the way.
 |
| So here is the carriage body |
 |
| Side view. Yes, it sticks outward. Convex shaped |
 |
| Tendrils and wrapped silver colored wire right side |
 |
| This is how I added the tendrils. I wrapped the 26 g around a piece of 12 gauge copper wire |
 |
| right side complete |
 |
| Left side. Pretty! |
 |
| This is what it looks from the inside |
 |
| finished--sorry for the poor picture, I didn't have a good light source and it was raining |
 |
| ~22 cm long, just right for my wrist |
 |
| close up of the carriage weave |


 |
| I'm so proud of my work. |
Now that it's completely assembled,I'm in a quandary about finishing it into a bracelet. It's too pretty to bend, but it's too big for a necklace component.
So people--I'm asking for a consensus. Should I finish it as originally planned--a bracelet? or as something else?
By the way, this part 2 came out better didn't it?
Peace
Zsmom
Monday, December 31, 2012
Using MS Word for blogging was stupid...
It may be a while more for part 2 of my Cinderella Pumpkin Carriage tutorial. I found out I can't just cut and paste from a word doc. to blogger. Dumb me. I'm exceedingly frustrated, and I really wanted to have a simple way to do it. I ended up having to download the word doc to google drive and then cut and pasted, and yet it still didn't transfer the way I wanted it to.
I'll have to go back to creating in blogger. Back to the drawing board.
zsmom
I'll have to go back to creating in blogger. Back to the drawing board.
zsmom
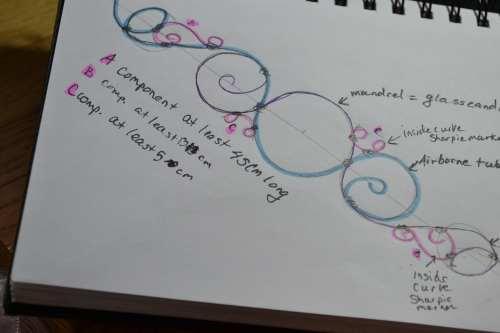
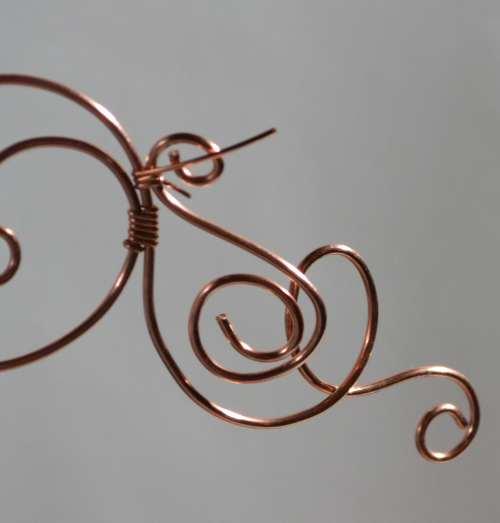
Cinderella’s Pumpkin Carriage Tutorial part 1

Cinderella’s Pumpkin Carriage Tutorial
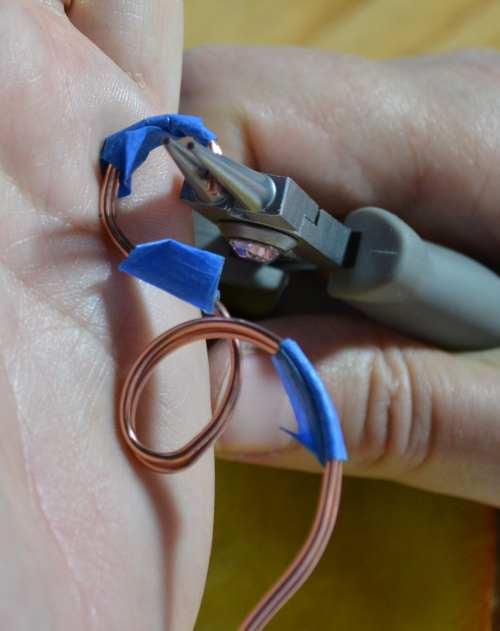
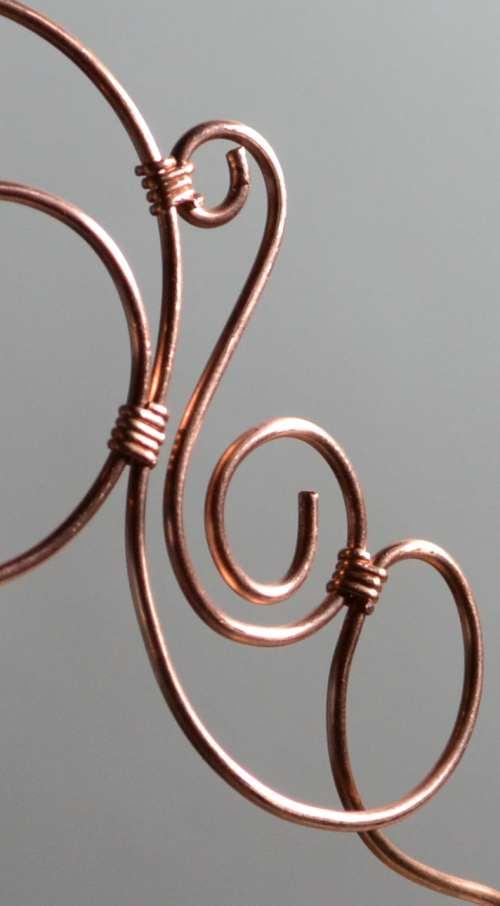
So, I was doodling and came up with a pretty wire design for a cuff bracelet using round wire. As I began to form the frame using dead soft 14 gauge round copper wire, my daughter, Sarah, says, “Hey, that looks like Cinderella’s carriage as it turns from a pumpkin to the carriage!” Thus the name of my piece was born, but in the end it also caused a quandary.First –a rough draft—it came about because I wanted a very fluid piece.
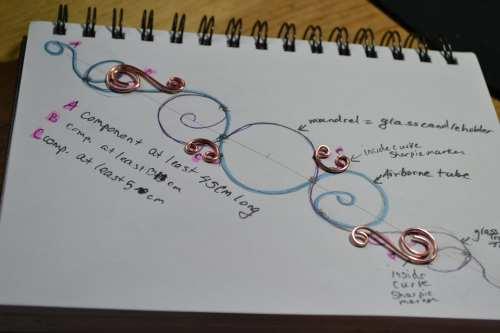 I made the small components first, and taped the longer wire together to allow me to bend them at the same time.
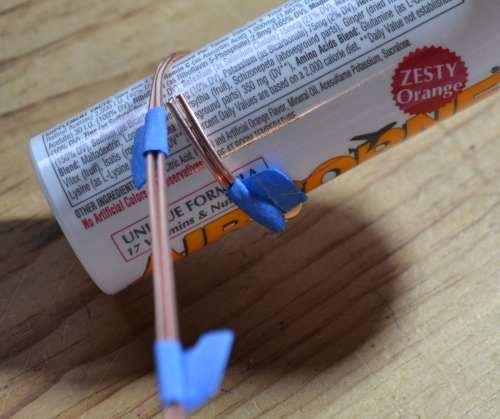 I used a mandrel for the beginning curve.
 Then used a larger mandrel for the big curve.
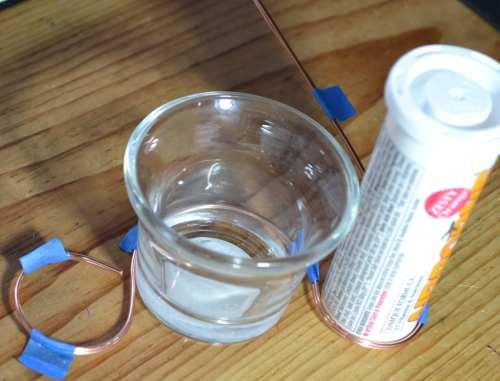 Then back to the smaller curve.
 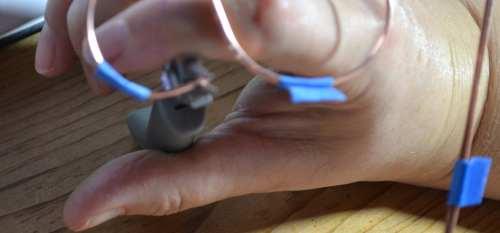 While the wires are still taped together, I turned the little loop with round nose pliers.
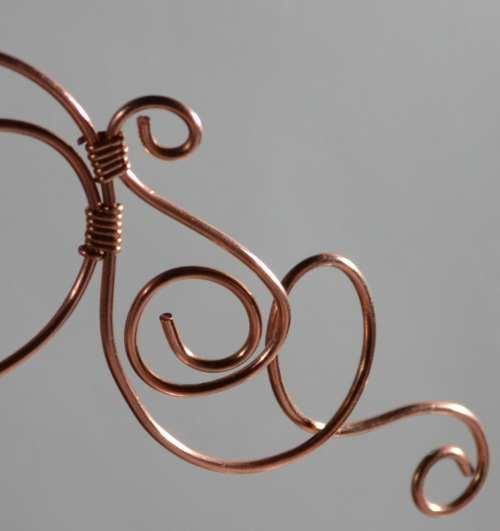
  So far this is what it looks like.
 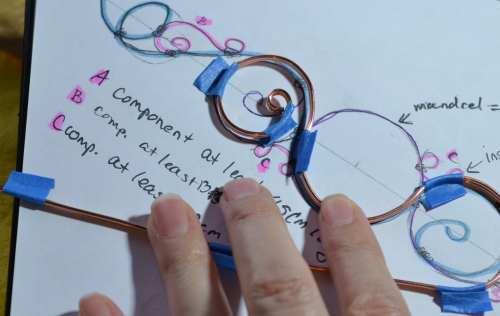 So using my pattern, I checked the curves—uh oh—a problem.
 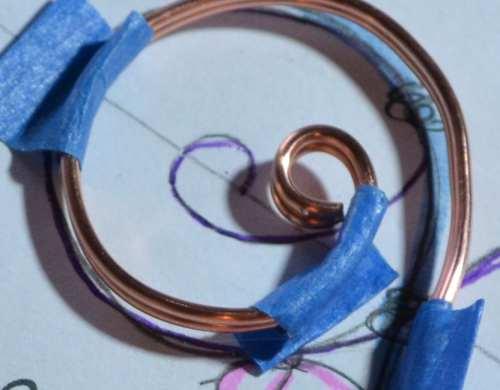 My little loop doesn’t line up.
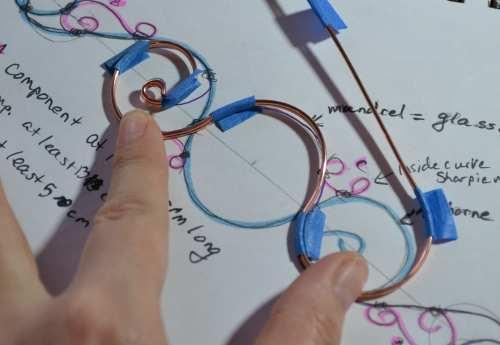 I readjusted the curves and continued following the pattern.
 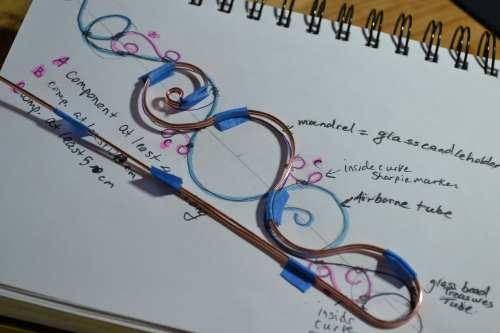 Continuing the pattern.
 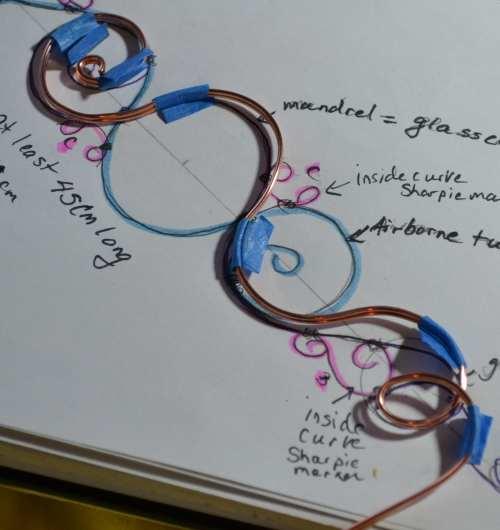 Little more to go.
 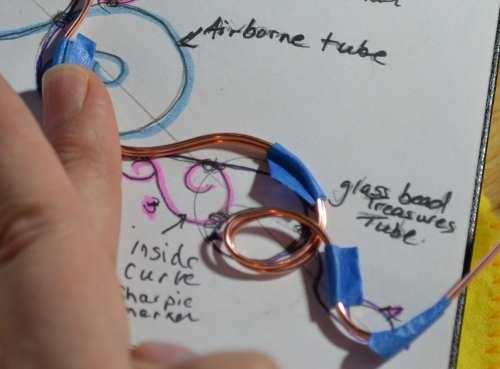 a bit more at the end.
  I had to cut the extra wire length. (on my notes I subtracted the extra I cut off to update my measurements in my notebook.
 sorry for the blurriness. I forgot to file the cut ends to smooth them until now.
 My next one I make will be filed before I begin bending it.
 I had to use my palm to bend the last part of the pattern—a small loop.
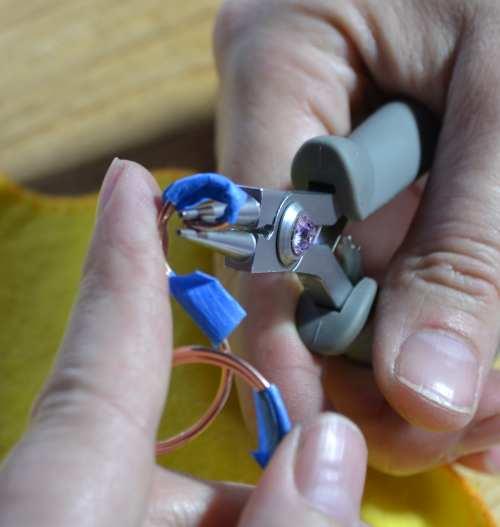 then pressed the last way with my index finger.
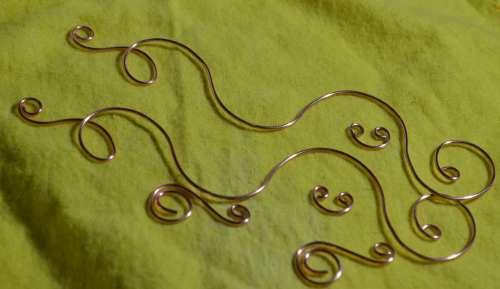 Now all the components are made. I lined them up. Looking good!
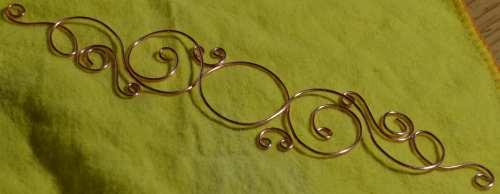
 I used a fisherman’s fly vice to hold my frame. Thanks Dad for the suggestion to use it.
 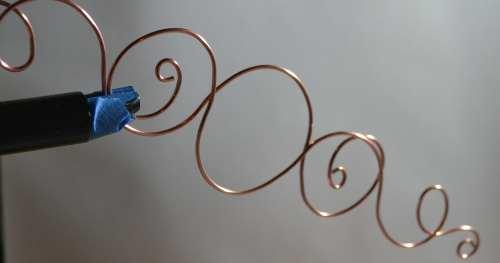 closer view—time to wire-wrap the connectors.
 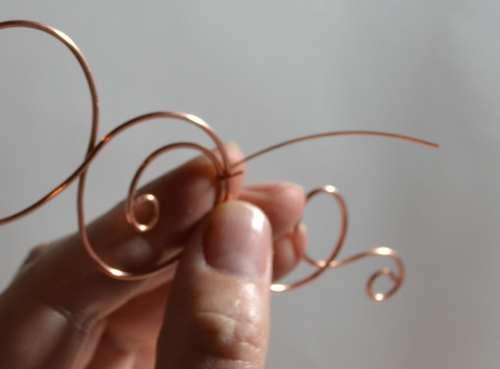 I used ½
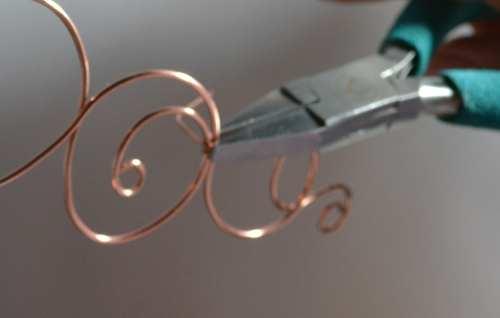 round 21
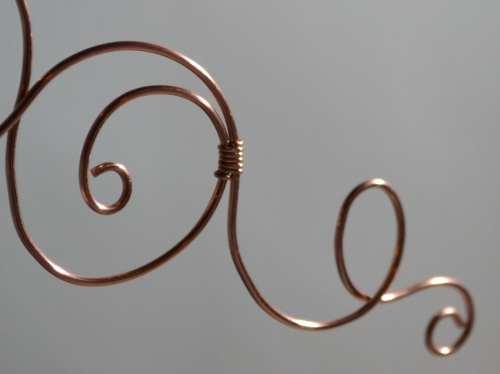
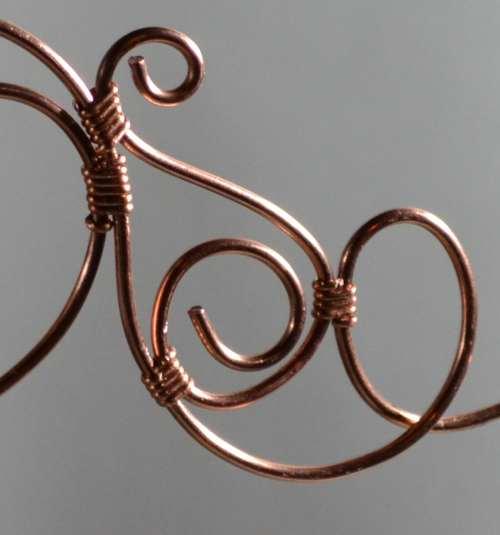
gauge copper.
Now the other side.
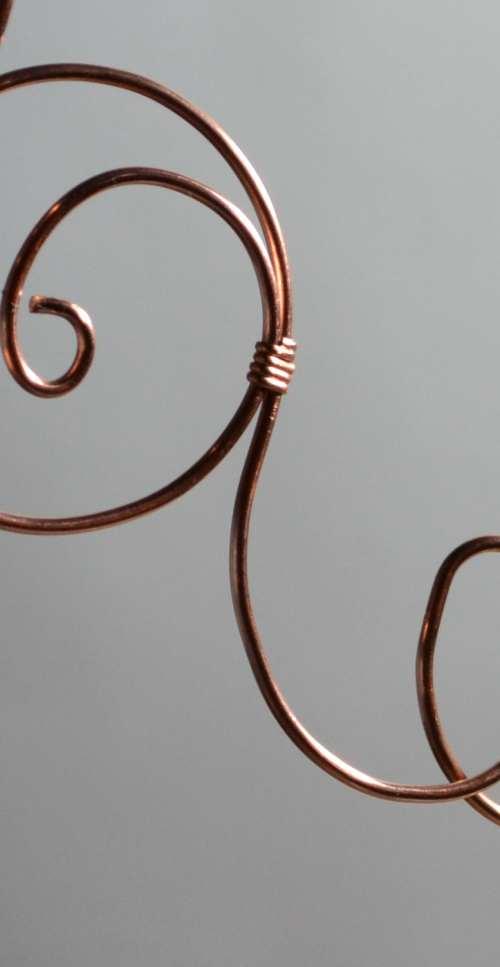
 Now it’s all together.
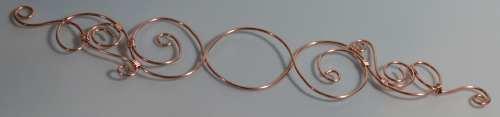
…What to do now? See part 2.
Subscribe to:
Posts (Atom)